How to make a blog into a real website
This article explains how you can use Blogger to make a site that looks just like any other website and why you might, sometimes, want to do this.
 Some people are very happy to use Blogger to make a blog, that is, website that looks like a diary or journal that they write in regularly.
But a common question is "how to I make my blog into a real website, just like "someone" has done over at "this website"?
This isn't easy to answer: Not everyone means the same thing when they say "real website". "Someone" might have just changed the background image, installed a third-party template, changed a few settings - or re-written the entire Blogger template! They may have just made the blog look more professional than the basic templates do - or maybe they've removing all "blog" features so that the site is like a regular brochure website.
The bottom-line is that, even with no changes a blog is a "real website", because it's got:
And there are some sites which are very popular and not at all ashamed to look like blogs, for example:
This article from Blogger Buster lists a 100 others - and I'm sure that there are plenty of popular non-English language sites that look like blogs, too.
But there are many other sites that have had some or all of their Blogger features hidden, for example
You need to do more work to make the second type of site - and even then, if a knowledgeable visitor looks at the source-code for a page, they can still tell that you're using Blogger. So, usually, I'd recommend that you focus on what you want to achieve with the site, rather than "getting rid of blogger".
That said, here is a lit of things that you may want to to do to "turn your blog into a website". They are in, roughly, the order that I recommend doing them to have the maximum effect.
 1) Get a custom domain
This is a website address like www.mySite.com or www.yourBlog.org - or whatever available name that you choose.
Using a custom domain means that your address will not have "blogspot.com" in it.
You can do this either:
This step is essential if you don't want the site to be perceived as blog, because the address is what people see when they first find the site in search-engine results.
If you are going to get a custom-domain, then I strongly recommend doing it at the very beginning of setting up your blog, so all the later steps are based on the custom-domain name rather than re-directions. This is is A Good Thing for SEO - and even if SEO doesn't matter for your blog initially it may become important later on.
2) Turn off the navBar, and remove the space where it used to be
3) Show only 1 post on the main page.
4) Hide the "blog-specific" values from posts, on the Layout > Blog post (edit) tab.
At a minimum the things to turn off are:
5) Make a home page - ideally using the custom-redirect option
6) Remove the attribution gadget (the bit where it says "Powered by Blogger")
7) Remove the "subscribe to posts (atom)" link
8) Add an RSS-subscription gadget using Feedburner.
Some people say this is optional - but I believe that all "proper" websites offer an RSS feed and show that they do so by using a feedburner-style RSS chiclet. If you just add Blogger's Subscribe gadget instead, it gives the Atom - ie blog-style feed.
9) Remove all gadgets that show a list of posts. These include the Archive, Labels. This is simply the reverse of the add-a-gadget procedure - edit the existing gadget, and click Remove.
10) Remove the "older posts / home / newer posts" links.
 11) Set up your own navigation system: every post or page needs to be able to be accessed from either a button or a link that is in either a gadget or another post/page.
It's temping to think about navigation from the home page. But first-time visitors who come to your site from search-results will not arrive at the home page. They might not even think to look at the home page. Ideally your navigation system should offer several routes to get to every piece of information, and should include both logical links between posts and a search-based option.
Tools that you might use to help with this:
An alternative to your own navigation system is to use categories to put your posts into pages. This doesn't fully reduce the bloggy feeling, since someone who looks at a page sees a list of posts (with just post-summaries if you've used jump-links). However changing the the status message (the grey box that says "showing all posts with label whatever") can make this acceptable in some sites (ie ones where the line between blog and website is blurred).
If your entire site could be done with 20 or fewer screens, you could use Pages for everything - but IMHO this isn't necessary, visitors don't seem to be overly spooked by URLs with numbers in them.
You cannot use a dynamic template
If you want your site to look like a website, not a blog: you need to use a Designer, or possibly a Layout, template.
You might want to link it to the social networks - remember that there are wide range of possible links, and you need a strategy about how the site relates to each social medium that you use.
But maybe I've missed some things? Maybe there are features that work differently on other templates.
What else would you do?
Blogs vs Websites

But a common question is "how to I make my blog into a real website, just like "someone" has done over at "this website"?
This isn't easy to answer: Not everyone means the same thing when they say "real website". "Someone" might have just changed the background image, installed a third-party template, changed a few settings - or re-written the entire Blogger template! They may have just made the blog look more professional than the basic templates do - or maybe they've removing all "blog" features so that the site is like a regular brochure website.
The bottom-line is that, even with no changes a blog is a "real website", because it's got:
- An url (www.your-blog-name.blogspot.com)
- A space on the internet that's dedicated just to it. (For Blogger users, that space is inside Google's servers - we don't have to pay for our own hosting).
- Web-pages, made in HTML, which visitors can look at using a web-browser (eg Internet Explorer, Firefox, Chrome, Safari, etc)
And there are some sites which are very popular and not at all ashamed to look like blogs, for example:
- www.IkeaHackers.net/ - a site for sharing clever ways of repurposing kitset furniture
- www.DarkRoastedBlend.com - a site about coffee - notice their About page is really just a post from 2005!
- www.HowAboutOrange.blogspot.com - a very stylish crafts website
- www.RUStling.org - a site listing all the songs in a large folk-song book
- www.TableQuizHelper.com - a site providing templates etc to quiz-organizers.
This article from Blogger Buster lists a 100 others - and I'm sure that there are plenty of popular non-English language sites that look like blogs, too.
But there are many other sites that have had some or all of their Blogger features hidden, for example
- www.GalwayTransport.info - a local public transport information site
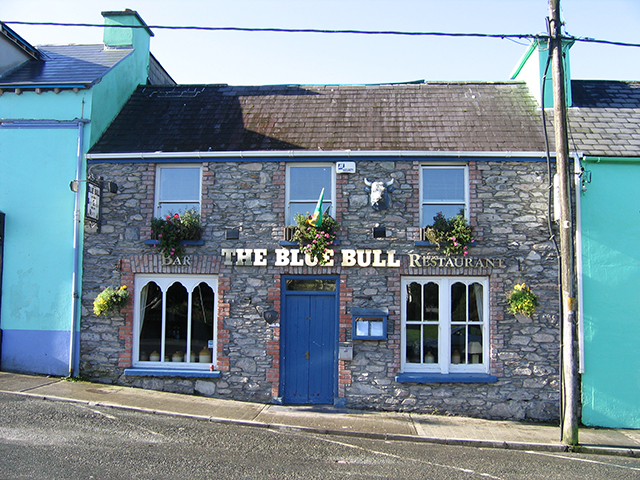
- www.ConcentricsRestaurants.com/ - a promotional site for a company that builds restaurants
- www.RenewPilates.com - the site for a Pilates studio
You need to do more work to make the second type of site - and even then, if a knowledgeable visitor looks at the source-code for a page, they can still tell that you're using Blogger. So, usually, I'd recommend that you focus on what you want to achieve with the site, rather than "getting rid of blogger".
That said, here is a lit of things that you may want to to do to "turn your blog into a website". They are in, roughly, the order that I recommend doing them to have the maximum effect.
Initial steps to reduce the "bloggy" feeling

This is a website address like www.mySite.com or www.yourBlog.org - or whatever available name that you choose.
Using a custom domain means that your address will not have "blogspot.com" in it.
You can do this either:
- Using Blogger's Settings > Basic > Blog Address > Add a Custom Domain function, or
- By using an URL that you buy directly from a domain registrar - you might need to do this if the address you want isn't available through the Blogger function (eg I recently needed a co.nz address for a site) or if you do not have a credit card.
This step is essential if you don't want the site to be perceived as blog, because the address is what people see when they first find the site in search-engine results.
If you are going to get a custom-domain, then I strongly recommend doing it at the very beginning of setting up your blog, so all the later steps are based on the custom-domain name rather than re-directions. This is is A Good Thing for SEO - and even if SEO doesn't matter for your blog initially it may become important later on.
2) Turn off the navBar, and remove the space where it used to be
3) Show only 1 post on the main page.
4) Hide the "blog-specific" values from posts, on the Layout > Blog post (edit) tab.
At a minimum the things to turn off are:
- Post-date
- Posted-by
- Post-time
- Comments
- Links to this post
- Labels
- Reactions
- Email post links
- Post sharing
5) Make a home page - ideally using the custom-redirect option
6) Remove the attribution gadget (the bit where it says "Powered by Blogger")
7) Remove the "subscribe to posts (atom)" link
8) Add an RSS-subscription gadget using Feedburner.
Some people say this is optional - but I believe that all "proper" websites offer an RSS feed and show that they do so by using a feedburner-style RSS chiclet. If you just add Blogger's Subscribe gadget instead, it gives the Atom - ie blog-style feed.
Banishing the Blogger look for good
These next steps really go together: if you do one, you need to do the others too. They are needed if you totally want to remove the blog-ish-ness:9) Remove all gadgets that show a list of posts. These include the Archive, Labels. This is simply the reverse of the add-a-gadget procedure - edit the existing gadget, and click Remove.
10) Remove the "older posts / home / newer posts" links.
It's temping to think about navigation from the home page. But first-time visitors who come to your site from search-results will not arrive at the home page. They might not even think to look at the home page. Ideally your navigation system should offer several routes to get to every piece of information, and should include both logical links between posts and a search-based option.
Tools that you might use to help with this:
- Summary posts, with links to detail pages about the topic. (Eg my public-transport site has a "city buses details" page, which links to individual route maps)
- A menu bar with links to the most-important summary posts.
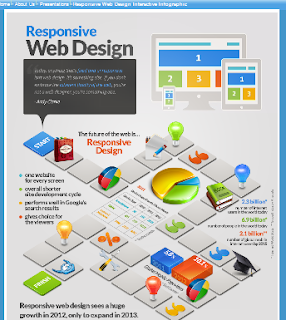
NB If you use the Pages gadget for this, it is automatically included if you give the site a mobile template which is an important step if you want the site to be responsive. - Linked-List gadgets to show summary posts, or lists of related detail posts, in the sidebar or footer.
An alternative to your own navigation system is to use categories to put your posts into pages. This doesn't fully reduce the bloggy feeling, since someone who looks at a page sees a list of posts (with just post-summaries if you've used jump-links). However changing the the status message (the grey box that says "showing all posts with label whatever") can make this acceptable in some sites (ie ones where the line between blog and website is blurred).
What you (currently) cannot do
You cannot remove the post-date values from the URL of blog posts.If your entire site could be done with 20 or fewer screens, you could use Pages for everything - but IMHO this isn't necessary, visitors don't seem to be overly spooked by URLs with numbers in them.
You cannot use a dynamic template
If you want your site to look like a website, not a blog: you need to use a Designer, or possibly a Layout, template.
Other things that you might do
You might want your blog tostand out in the seach results in order to get more visitors - see Getting Started with SEO.You might want to link it to the social networks - remember that there are wide range of possible links, and you need a strategy about how the site relates to each social medium that you use.
Have I missed anything?
I wrote this article while I was setting up a site on which I want to minimise the "blog" look-and-feel, and I've tried to capture all the steps that I did.But maybe I've missed some things? Maybe there are features that work differently on other templates.
What else would you do?


.gif)
.jpg)


.jpg)
.jpg)

.jpg)